User manual
Manage workspaces
Introduction
Workspaces are virtual environments where users organize and manage their certification processes. For example, each workspace can represent a distinct company department. Workspaces separate entities within the system. Users in one workspace cannot view entities assigned to other workspaces, such as tests, training courses, surveys, question pools, question categories, users, and user groups.
If you want to organize the application using workspaces, you need to follow these steps:
-
Assign users to the desired workspaces through membership rules or direct assignment.
-
If necessary, distribute existing entities among workspaces or organize the creation of new entities according to workspaces.
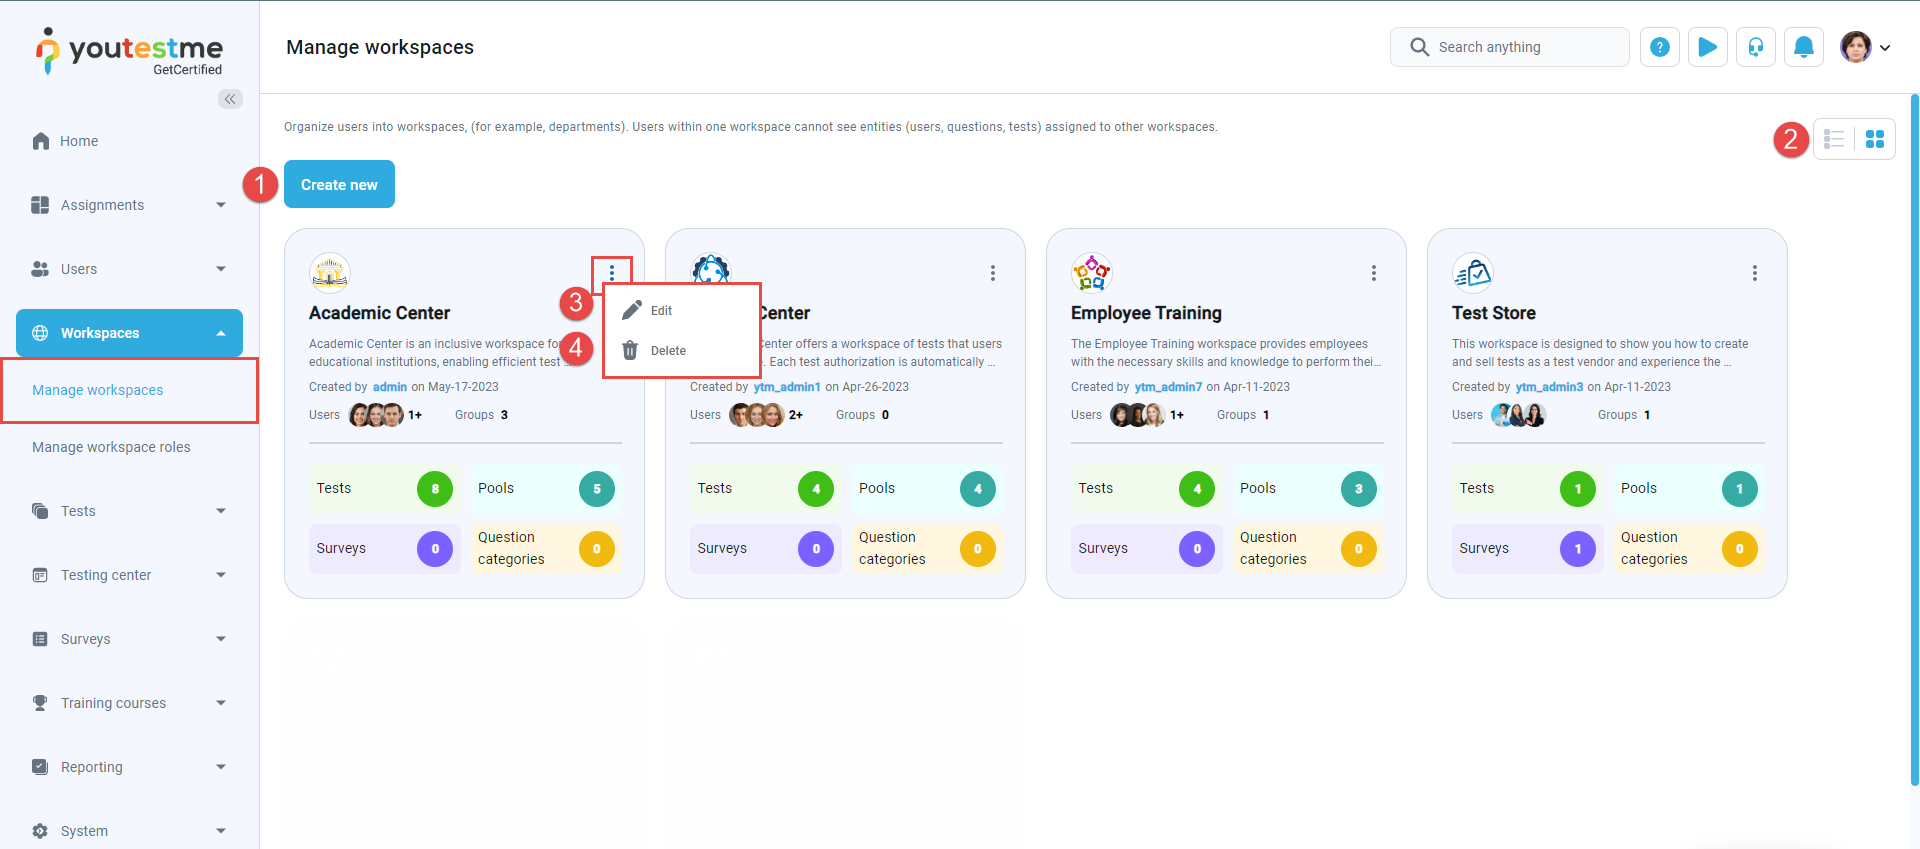
The Manage workspaces page provides an overview of all workspaces within the system.
Actions that can be performed on this page include:
-
Option to view the contents of the page in Tile or List format.
-
Edit a workspace. Find additional information about each field in the Information chapter.
-
Delete the workspace. If any data is assigned to the workspace, deletion is not possible. To delete the workspace, ensure that all associated data (users, tests, etc.) has been removed beforehand.
-
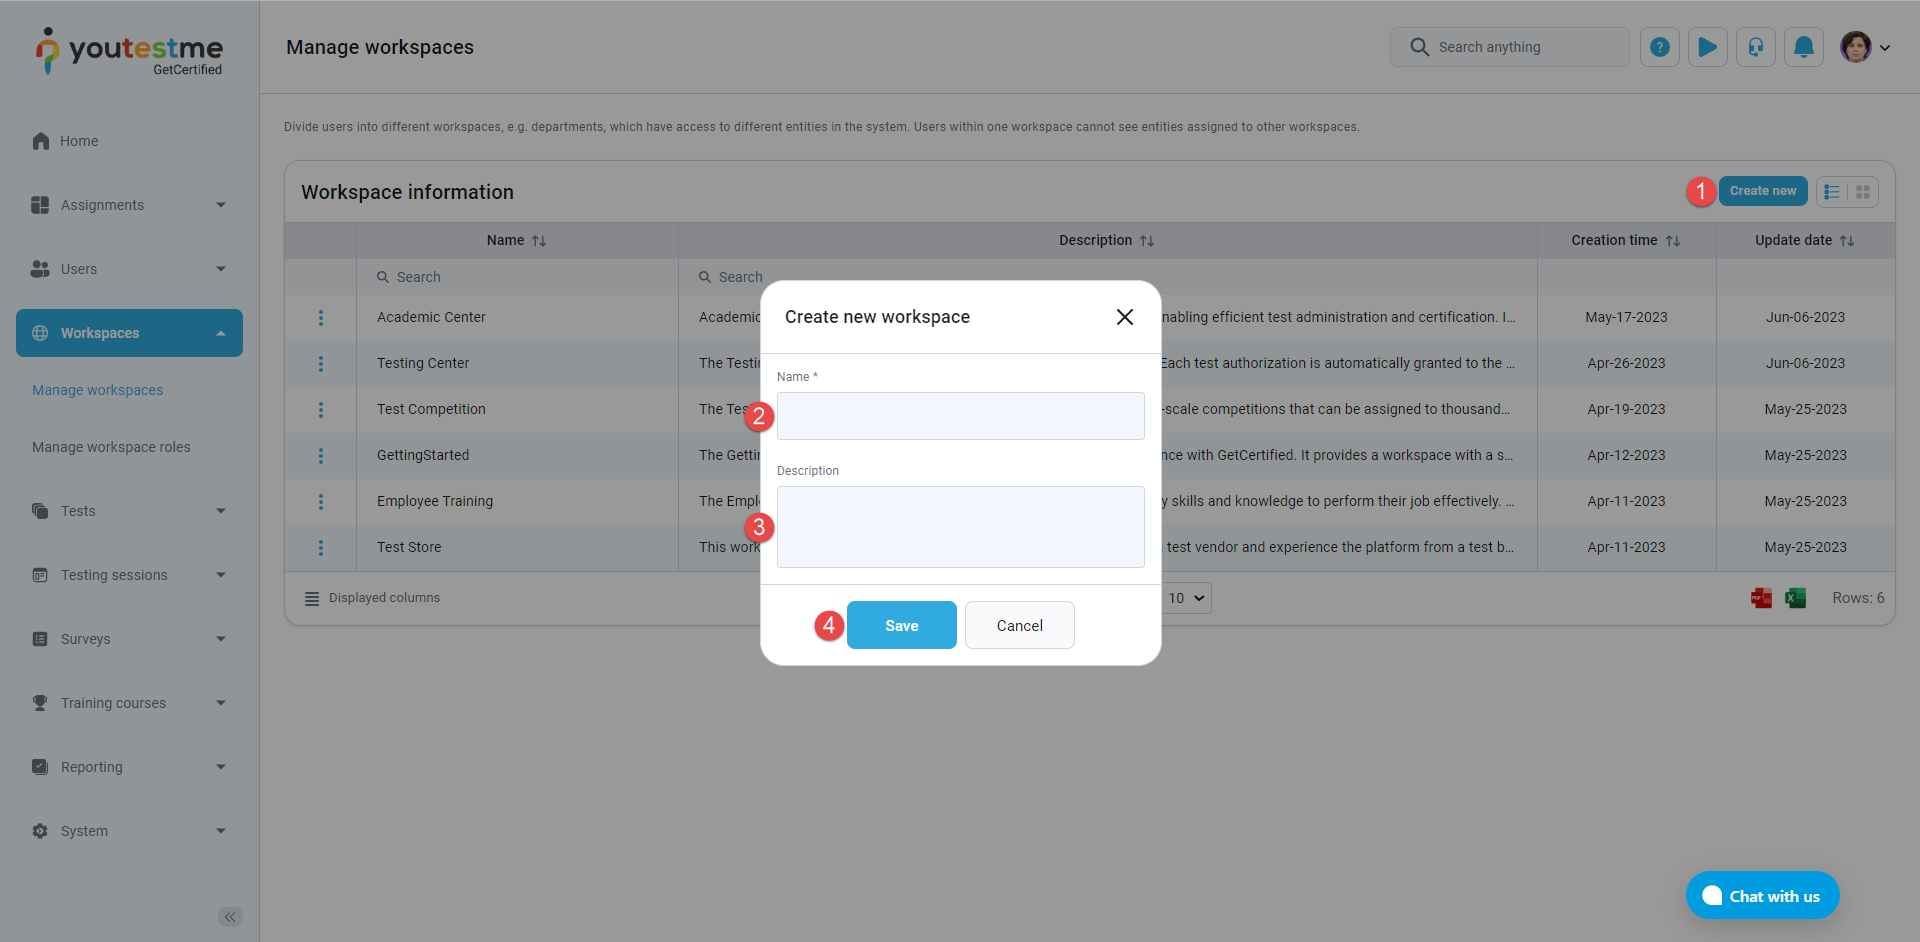
Creating a new workspace
To create a new workspace:
-
Click the Create new button.
-
Enter the name of the workspace.
-
Enter a description to provide additional information about the workspace.
-
Click the Save button.
-
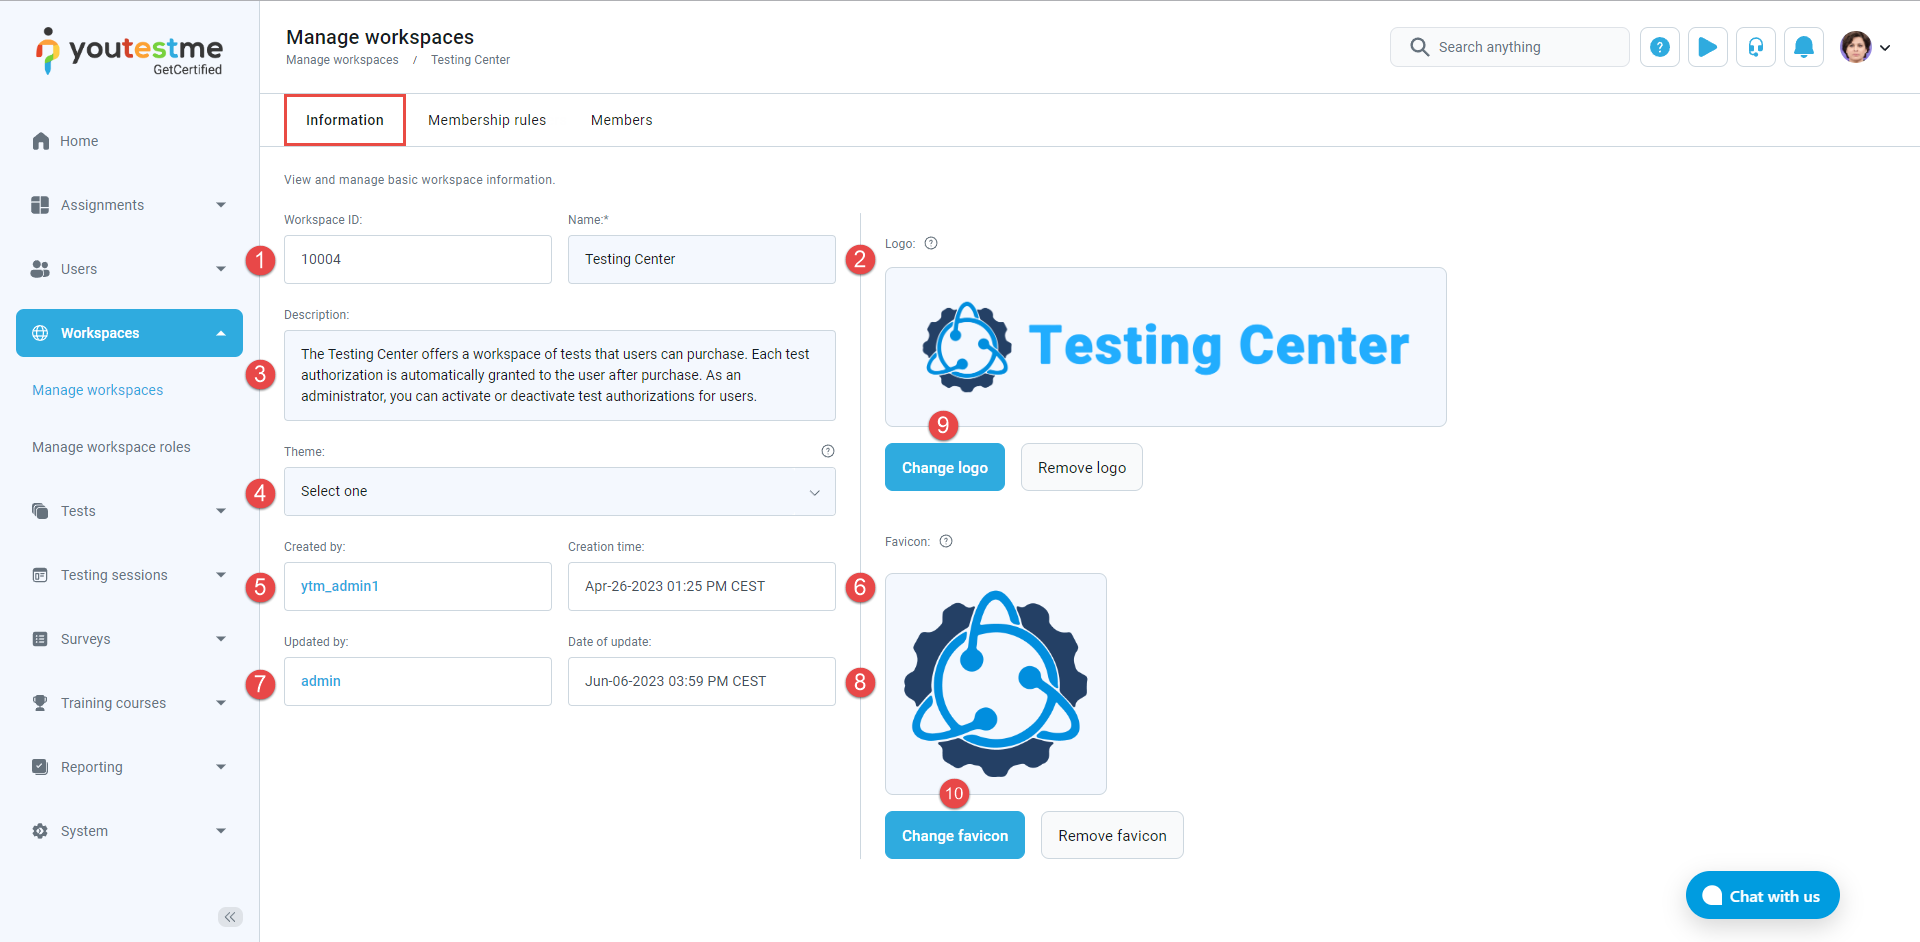
Workspace information
The Information tab displays the following workspace settings:
-
Workspace ID - A unique value generated automatically upon workspace creation.
-
Name - A unique name for the workspace.
-
Description - Provides additional information about the workspace.
-
Theme - Customizes the user interface by replacing the application's default theme. The chosen theme will be applied to all members of the workspace.
-
Created by - Displays the username of the workspace creator.
-
Creation date - Displays the date when the workspace was created.
-
Updated by - Displays the username of the user who last updated the workspace.
-
Date of update - Displays the date and time of the workspace's last update.
-
Logo - An uploaded image that will replace the system logo for all members of the workspace.
-
Favicon - An uploaded image that will replace the system favicon for all members of the workspace.
-
-
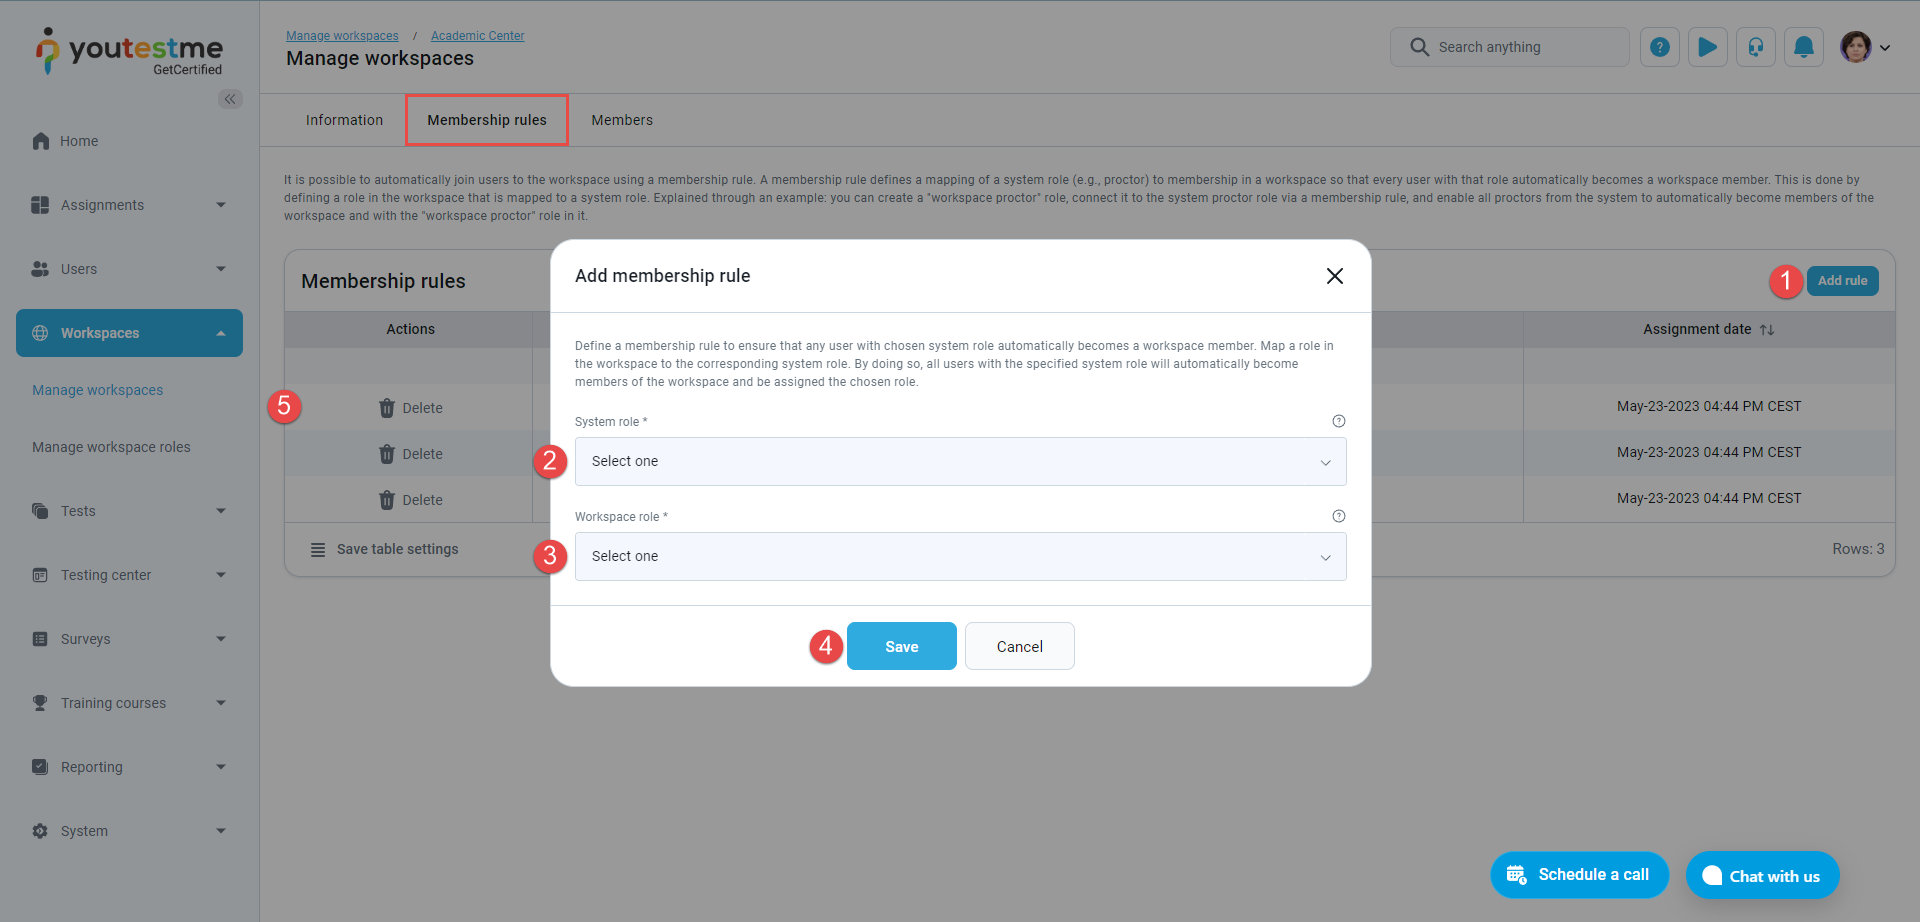
Membership rules
Automating user inclusion into a workspace is possible using a membership rule. This rule establishes a correlation between a system role (e.g., proctor) and membership in a workspace. For instance, by creating a workspace proctor role linked to the system's proctor role through a membership rule, all proctors within the system automatically gain membership in the workspace and assume the workspace proctor role.
To add a membership rule:
-
Click the Create new membership rule button.
-
Choose the System role. All users possessing the selected system role will be assigned to the workspace role chosen below.
-
Choose the Workspace role. The selected workspace role will provide assigned users with the permissions associated with that specific role within the workspace.
-
Click the Save button.
-
To delete a membership rule, click the respective icon next to the rule you want to remove.
-
-
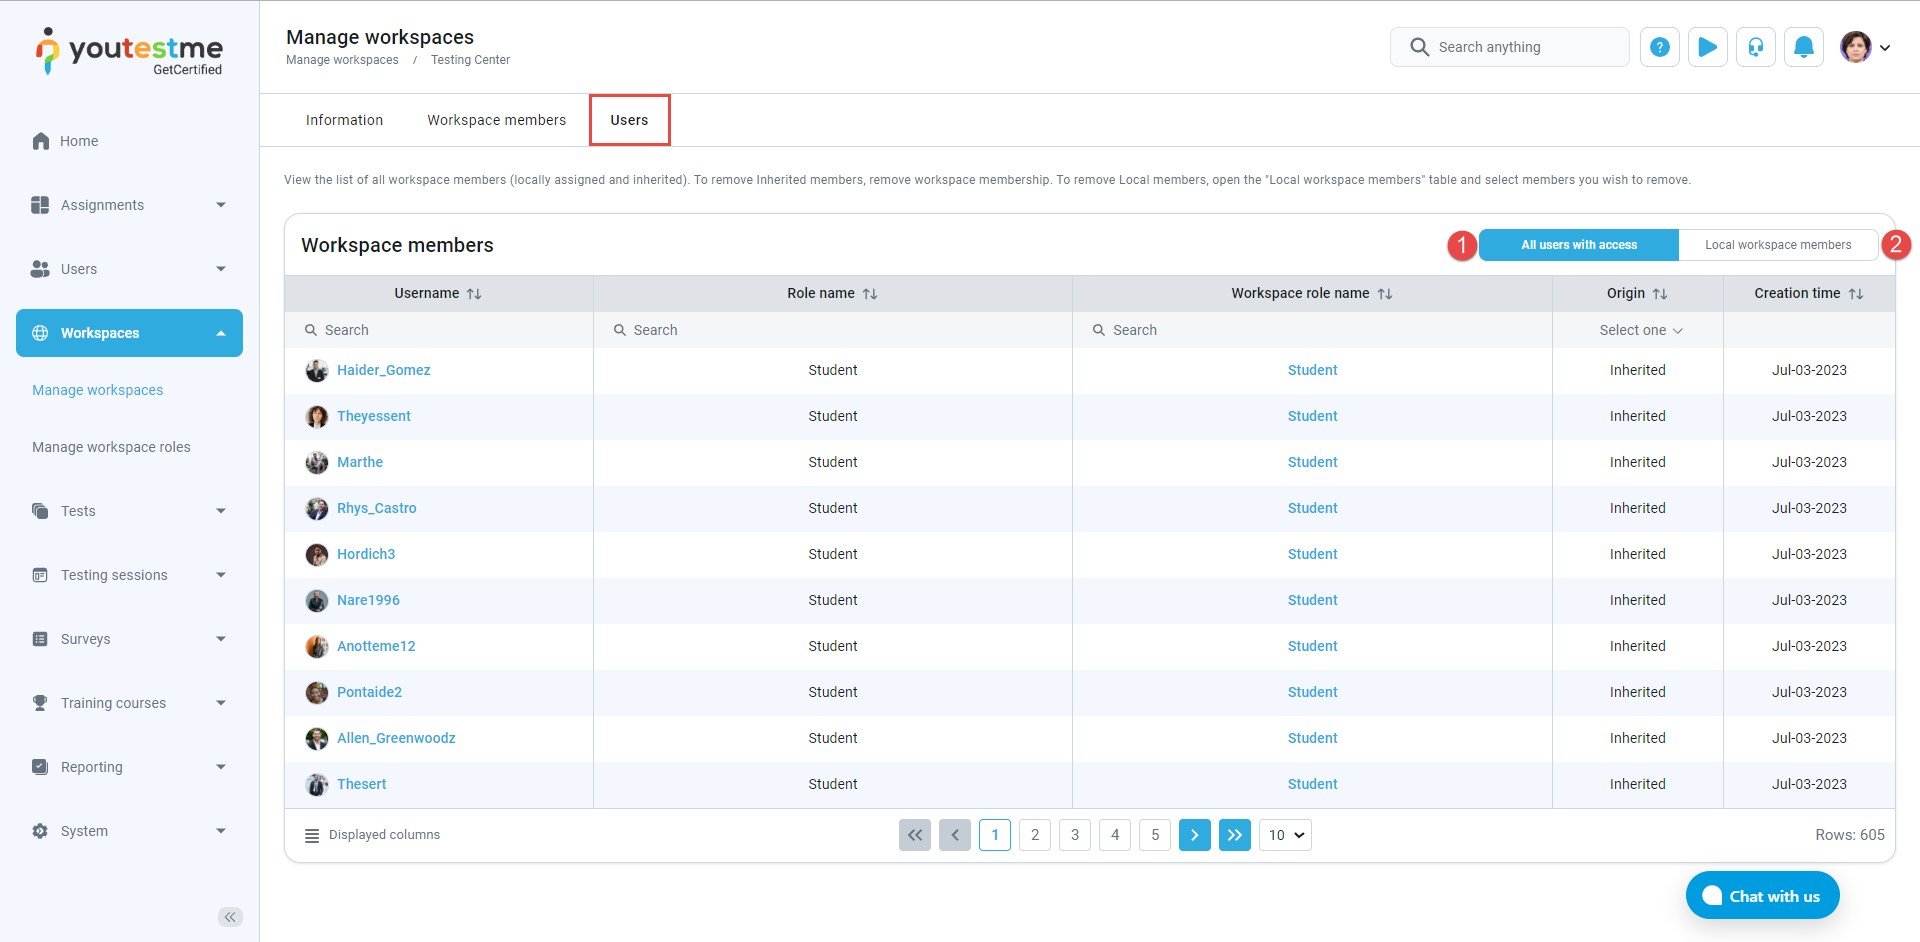
Workspace members
This tab shows a list of all members assigned to this workspace, along with their respective roles.
Available actions:
-
Add users to workspace - Click to manually add users to the workspace.
-
Filter - Filters the list to show only manually added workspace members.
-
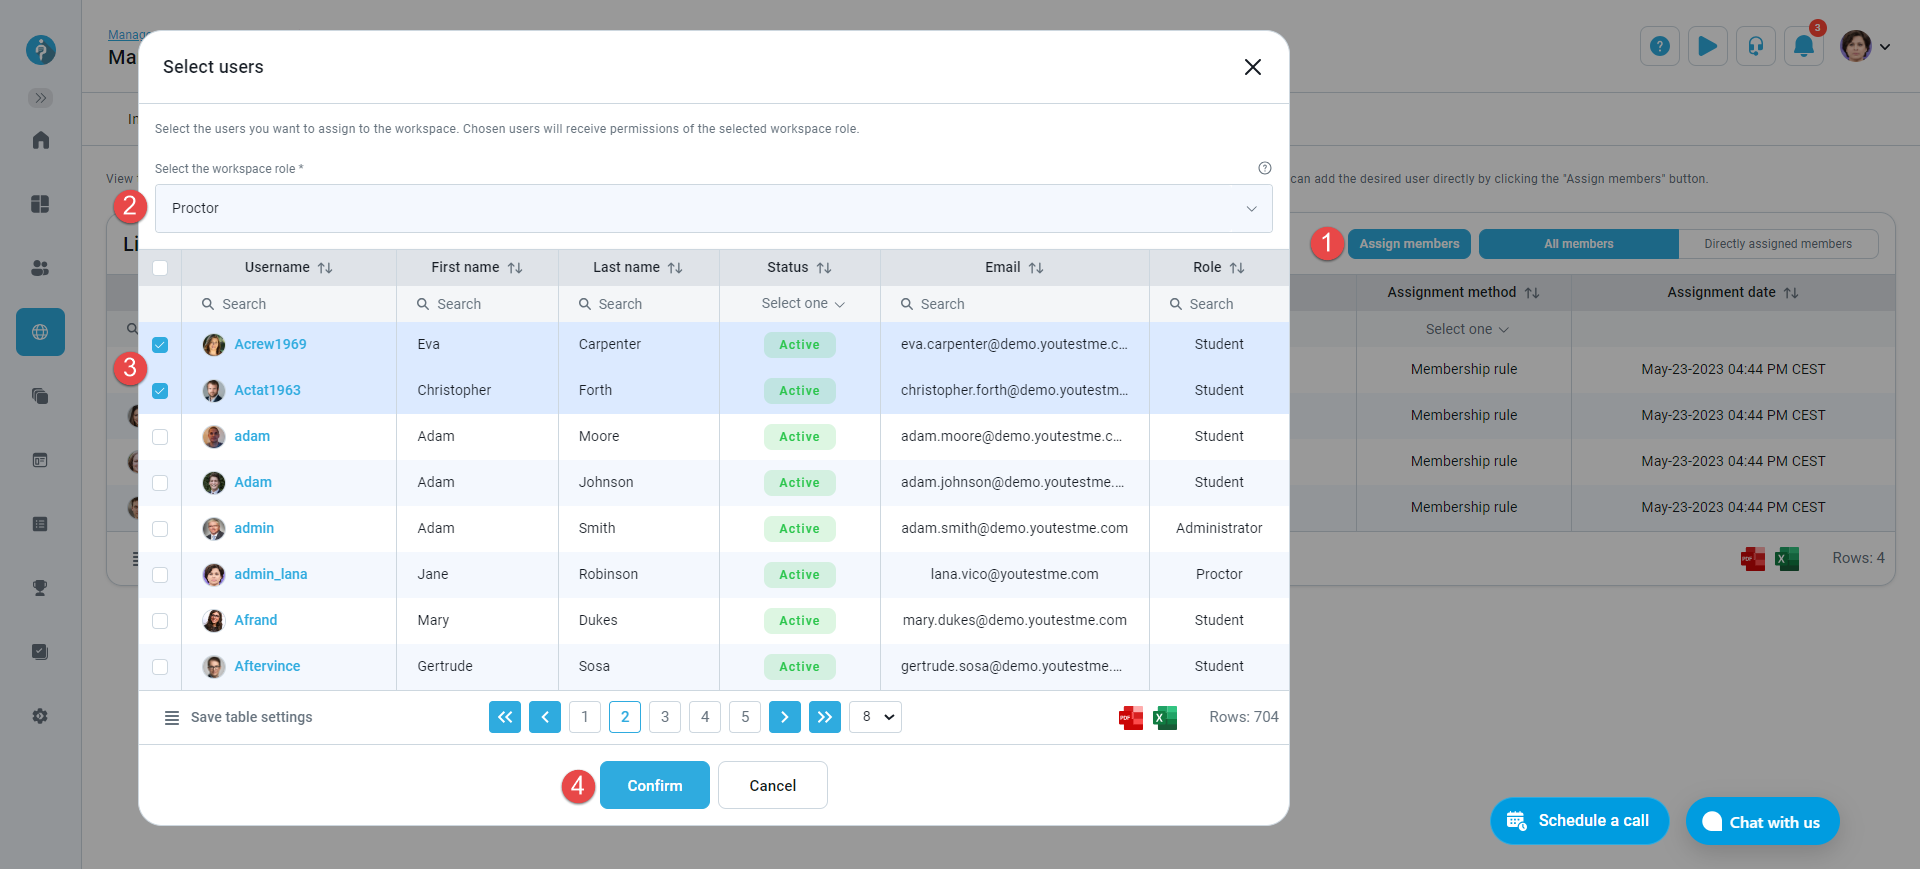
Directly assign members
To directly assign members to a workspace:
-
Click the Add users to workspace button.
-
Choose the Workspace role. The selected workspace role will provide assigned users with the permissions associated with that specific role within the workspace.
-
Select the users you wish to assign.
-
Click the Confirm button.
-
-
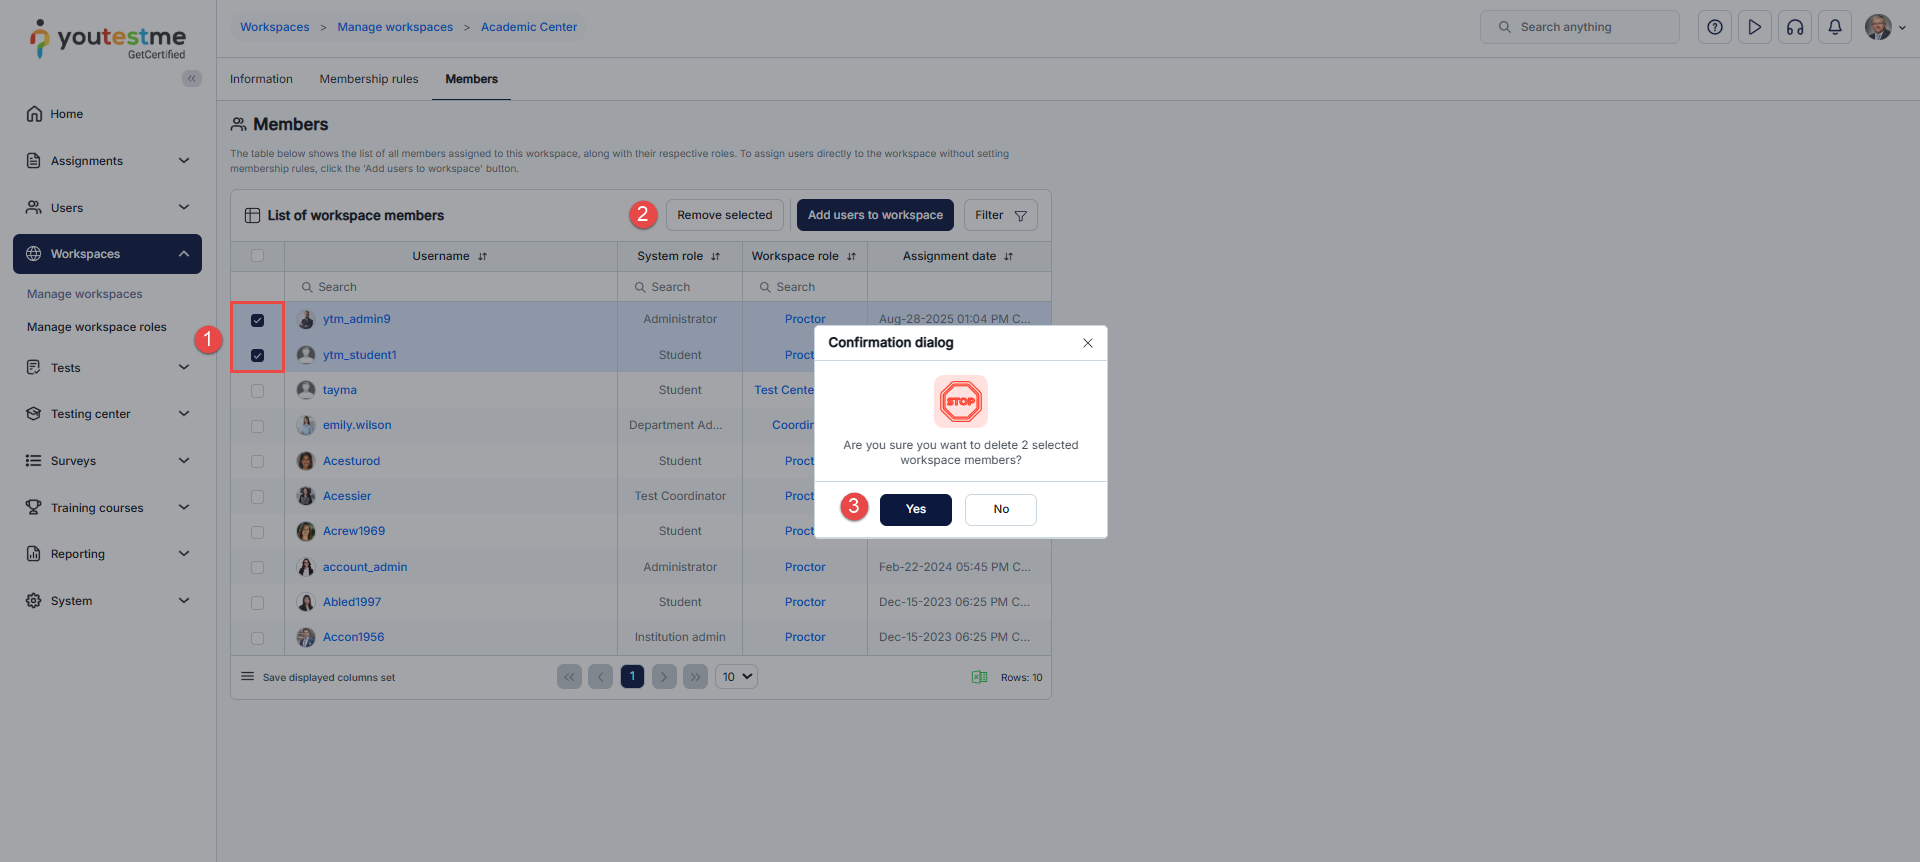
Removing directly assigned members
To remove members from a workspace:
-
Select the users you wish to remove.
-
Click the Remove selected button.
-
Click the Yes button.
Assignments completed by removed users will remain visible on their Assignments page. Access to other entities (such as tests, surveys, and user groups) associated with that specific workspace, will be prohibited.
-
-
-